Black does not challenge the center immediately; they prepare …d5.
This is a very solid defense for Black, and the theory is quite easy to absorb up to an intermediate level.
Typical structure: Black pawn on e6, White pawn on e5 (a closed pawn chain), where each side attacks on the opposite wing.
Strengths
Solid and reliable: difficult to break through directly.
Gives Black a clear counterattacking plan: the …c5 break (and sometimes …f6).
Requires less theoretical knowledge compared to the Sicilian or the Ruy Lopez.
A very good opening for learning positional play (strong squares, maneuvering, long-term plans).
Weaknesses
The light-squared bishop (c8) is often restricted → nicknamed the “bad bishop.”
White can impose a lasting space advantage with e5.
The position is sometimes very closed, requiring Black to wait a long time before finding counterplay.
If Black misses the correct timing for …c5 or …f6, they risk getting suffocated.
The Advance Variation
Push it…
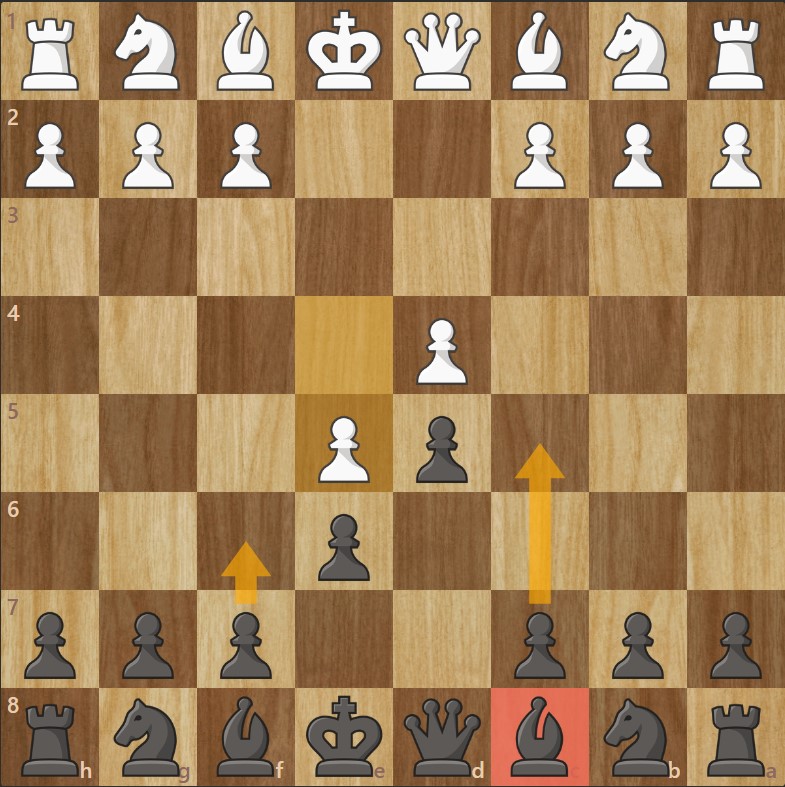
1. e4 e6
2. d4 d5
3. e5
White immediately closes the center by advancing the e5 pawn.
Pawn chain:
White → pawns on e5 and d4 pointing toward the kingside.
Black → pawns on e6 and d5 pointing toward the queenside.
Each side therefore knows where to attack:
White → on the kingside (f4–f5, g4–g5).
Black → on the queenside (…c5, …Qb6, …Nc6 followed by …cxd4).
The challenge for Black is to bring their bad bishop (c8) to life, as it is currently completely locked in.
Battle for the center
3. e5 c5
A typical Black move: immediately challenging the center.
4. dxc5(the mistake White should avoid)
White captures the pawn.
This is a rare choice: instead of defending the center with c3, they try to keep a material pawn advantage.
Problem: the c5 pawn is often fragile and will delay White’s development.
4… Nc6
Black develops while forcing White to bring out the knight to f3. The c5 pawn is doomed anyway…
5. Nf3
White develops a piece and defends e5.
Despite this, the e5 pawn is isolated and difficult to maintain in the center. In this situation, Black holds a clear positional advantage.
The White trap
3… c5
4. Nf3 cxd4
White develops instead of defending e5 with c3.
Black exchanges in the center and opens the c-file.
5. Bd3 Nc6
White targets h7.
Black develops naturally and increases pressure on e5/d4.
6. O-O Bc5
White castles early, keeping the king safe.
Black develops aggressively, targeting the f2 pawn.
7. Bf4 Nge7
The bishop develops to an active square.
Black brings the knight to e7, a classic preparation for …Ng6, attacking the bishop on f4.
8. Nbd2
White completes their knight development, preparing Nb3 or Nb3–c5 depending on the plan.
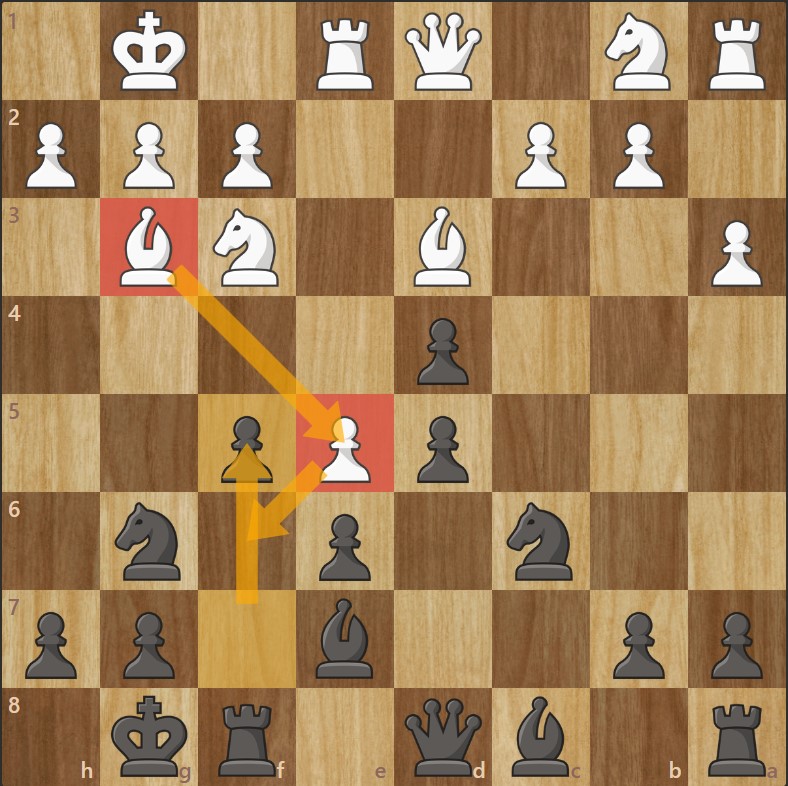
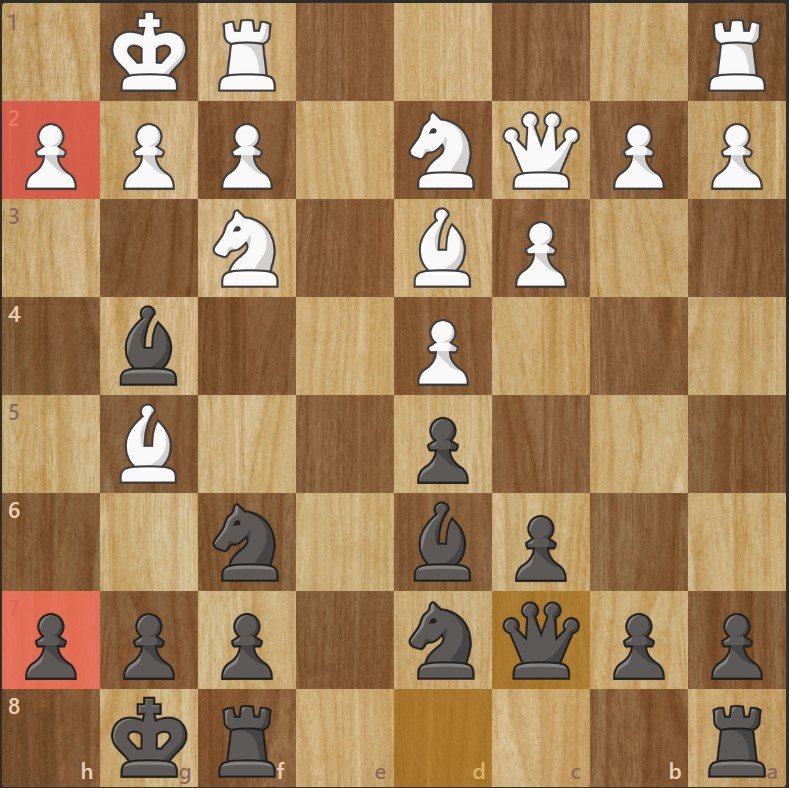
The Calabrese sacrifice
8… O-O
9. Bxh7+
The sacrifice opens the diagonal for the queen and forces the black king into the open.
9… Kxh7
10. Ng5+
The knight jumps in with check, forcing the king to retreat.
10… Kg8
11. Qh5
The queen joins the attack, targeting h7 and f7.
Checkmate is almost unavoidable.
A good line
4. Nf3
White develops a piece instead of defending the center with c3.
4… cxd4
5. Bd3
Black exchanges in the center; the white bishop protects e4/e5 and targets h7.
5…Nc6
Pressure on e5 and d4, active development.
6. O-O
White castles, secures the king, and prepares Re1/Nbd2.
6… Nge7
Flexible development — Black aims for g6 to attack e5 and f4.
The Black center
7. Bf4 Ng6
White activates the bishop, adding more pressure on d6.
Black replies logically with Ng6, chasing the bishop and targeting e5.
8. Bg3 Be7
The bishop retreats to a key diagonal (b8–h2).
Black prepares to castle while developing harmoniously.
9. a3 O-O
A prophylactic move: White prevents …Nb4 (which would target d3).
Black castles, securing the king and preparing the pawn break …f6 or …f5.
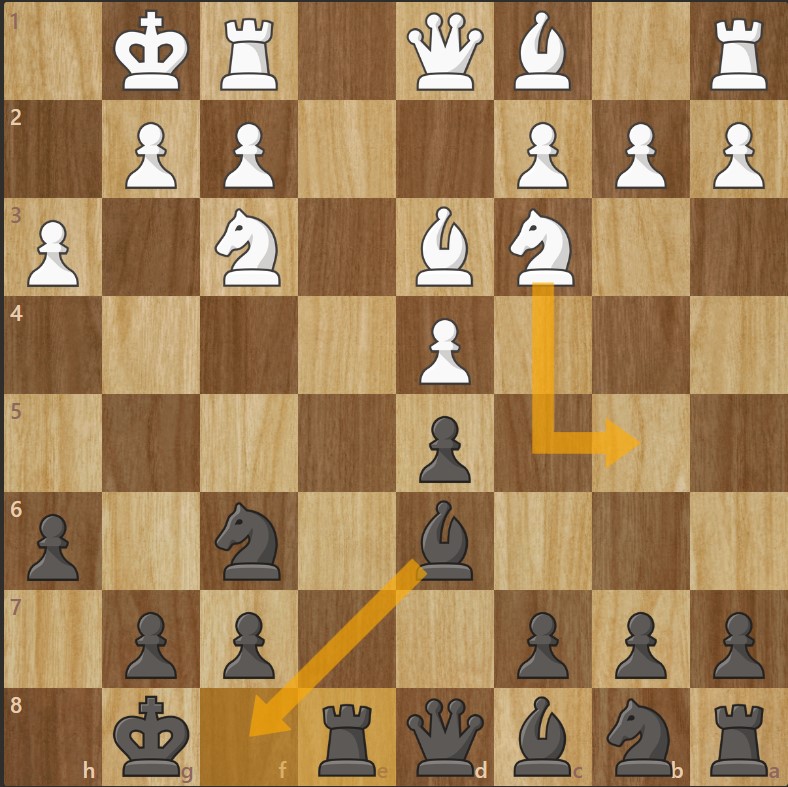
10. Re1 f5
White centralizes the rook.
Black launches the …f5 break to undermine the e5 pawn and activate their pieces.
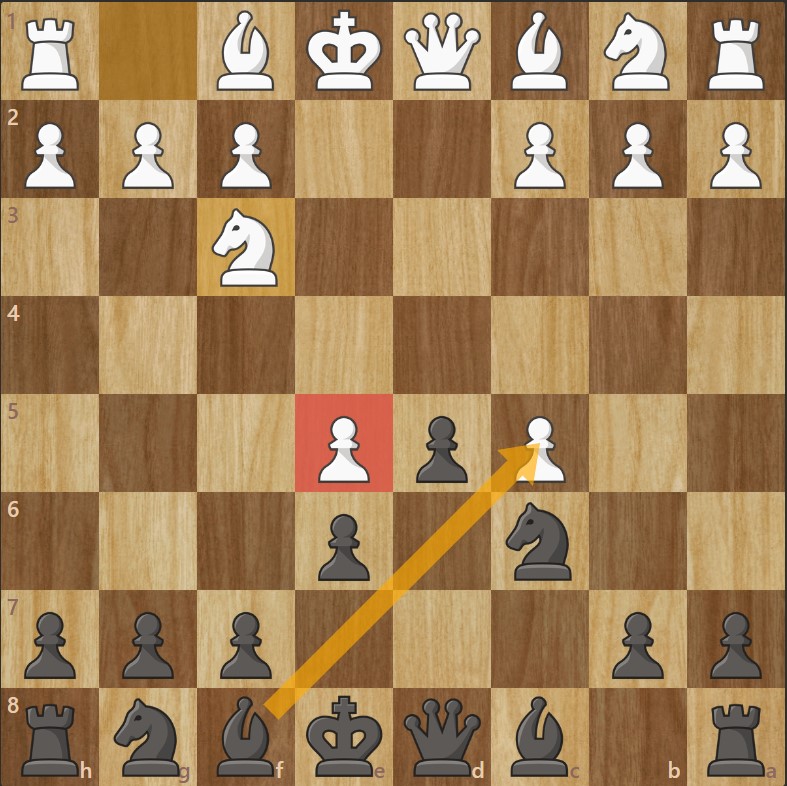
11. exf6 Bxf6
White chooses to capture.
After the bishop recaptures, Black has a very active bishop on f6, pointing toward b2 and h4, with increased central pressure.
Note that if White does not capture en passant, their bishop on g3 would become completely trapped.
The main move !
3… c5
Black strikes in the center immediately.
4. c3 Ne7
White reinforces the center with c3 (a solid pawn chain e5–d4–c3).
Black develops the knight via e7.
5. Nf3 Nec6
Logical development for White, preparing Bd3 and castling.
Black continues developing the knight to c6 to control e5 and d4.
6. Bd3 b6
The white bishop develops along the key h7 diagonal.
Black prepares to exchange their “bad bishop” by developing it to a6.
Bad bishop / Good bishop
7. O-O Ba6
Black chooses to develop their dark-squared bishop to a6.
Idea: exchange this bishop for White’s bishop on d3 → this removes the classic weakness of the “bad bishop”, which gets traded for White’s good bishop. (White’s pawn chain controls the dark squares, so their light-squared bishop is the “good” one.)
8. Bxa6 Nxa6
White accepts the exchange.
Black recaptures with the knight, which develops and targets the b4 and c5 squares.
This knight will often return to its original square after the double attack with Qa4.
Without exchanging bishops ?
Let’s now look at the case where White chooses not to exchange their good bishop for Black’s bad one.
7. Qe2
White decides to add more pressure to the a6 square, delaying the arrival of the black bishop on a6.
Black: Don’t take !
7…a5
Black plays …a5 to prevent b4 and to add a defender to the future escape square of the c8 bishop.
8. a4 Ba6
White mirrors the move, fixing the queenside structure.
Black develops the dark-squared bishop to a6 to exchange it for the bishop on d3.
9. Bb5
White pins the knight on c6.
WARNING: Here, Black must not capture the bishop on b5, because after axb5, White’s pawn would control all the key escape squares for Black’s pieces.
The correct line for Black
9…Be7
Black continues developing, preparing to castle.
10. O-O O-O
Both sides castle, placing their kings safely.
11. Nbd2 cxd4
12. Nxd4 Nxd4
13. cxd4 Qc8
Black chooses to exchange quickly in the center.
Advantage for Black
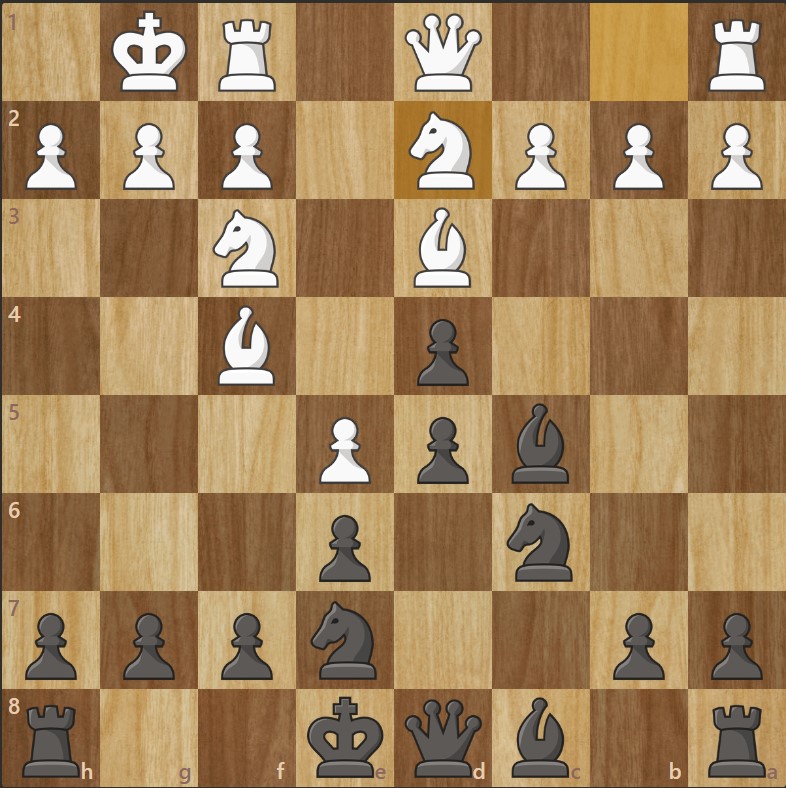
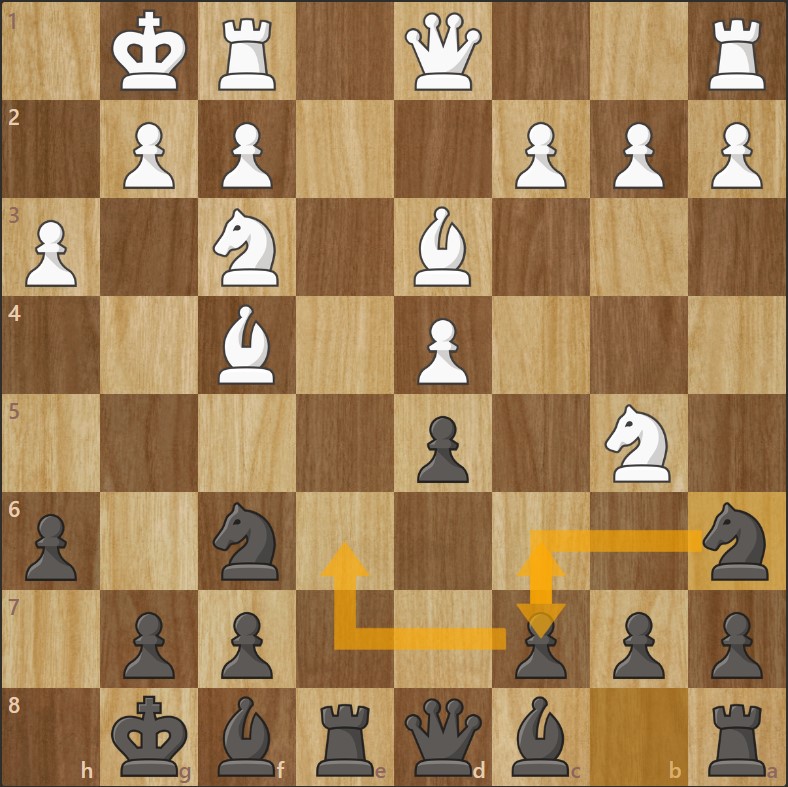
14. Nb1 Nc6
15. Be3 Bxb5
16. axb5 Na7
White recaptures, and the b5 pawn becomes advanced and doubled.
17. Nc3 Qd7
White repositions the knight to a more active square.
Black places the queen on d7: a double attack on the b5 pawn.
18. Rfc1 Bb4
Black develops the bishop to b4: after the bishop is exchanged for the knight, the b5 pawn can be recovered.
At the end of this sequence, Black has a clear advantage, with a queenside majority already well advanced. Meanwhile, White has still not managed to exploit their positional prospects on the kingside.
The Exchange Variation
A mirrored game
In this case, instead of advancing their pawn to e6 on move 3, Black exchanges pawns on d5.
The most natural resulting position is a mirror structure for both sides, as shown above.
1. e4 e6
2. d4 d5
3. exd5 exd5
Then both sides develop their knights, then their bishops, and finally castle kingside.
The logical continuation
After each knight pins the opponent’s knight on f6 and f3, the following position is perfectly logical.
Black’s plan will be to unpin their queen and then fight for control of the open file.
Mirror threat
After this sequence, the opening is completed for both sides. White is threatening the h7 square, while Black is threatening the h2 square.
If both sides continue playing symmetrically and exchange pieces, Black’s structure is solid enough to achieve a draw with accurate play.
White breaks the symmetry
1. e4 e6
2. d4 d5
3. exd5 exd5
White chooses the Exchange Variation.
4. Nf3 Nf6
5. Bd3 Bd6
Natural development from both sides.
6. O-O O-O
Both kings are safe.
The position remains balanced.
7. h3 h6
White prevents …Bg4, and Black mirrors the idea.
This is typical of the Exchange structure: both sides avoid pins.
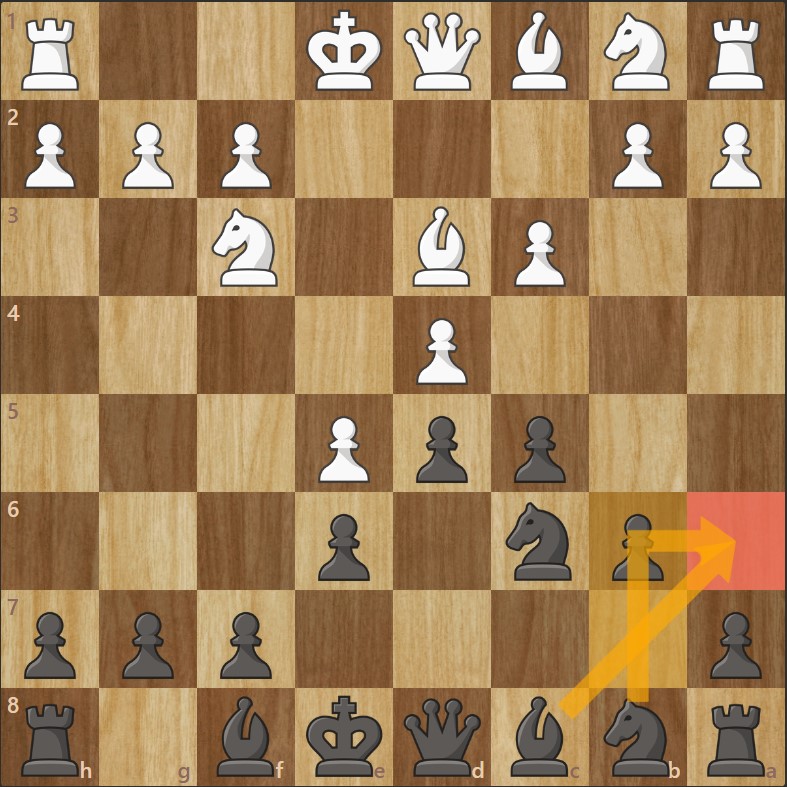
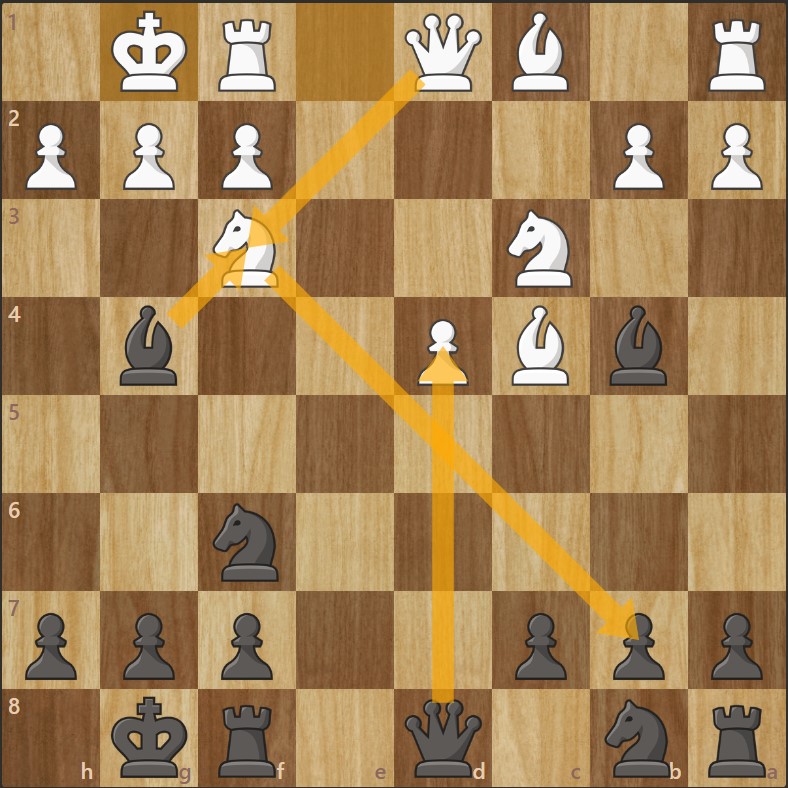
8. Nc3 Re8
White activates the knight toward the center and threatens Nb5 (see diagram).
Black places the rook on e8. This allows them to occupy the open file and gives their bishop a retreat square in case White plays Nb5 (see diagram).
Pressure on c7
9. Nb5
White threatens an annoying exchange on c7.
This is an active way to break the typical symmetry of this variation.
9… Bf8
Black withdraws the bishop to cover d6 and maintain a solid structure.
10. Bf4
White activates their light-squared bishop. Double pressure: on c7.
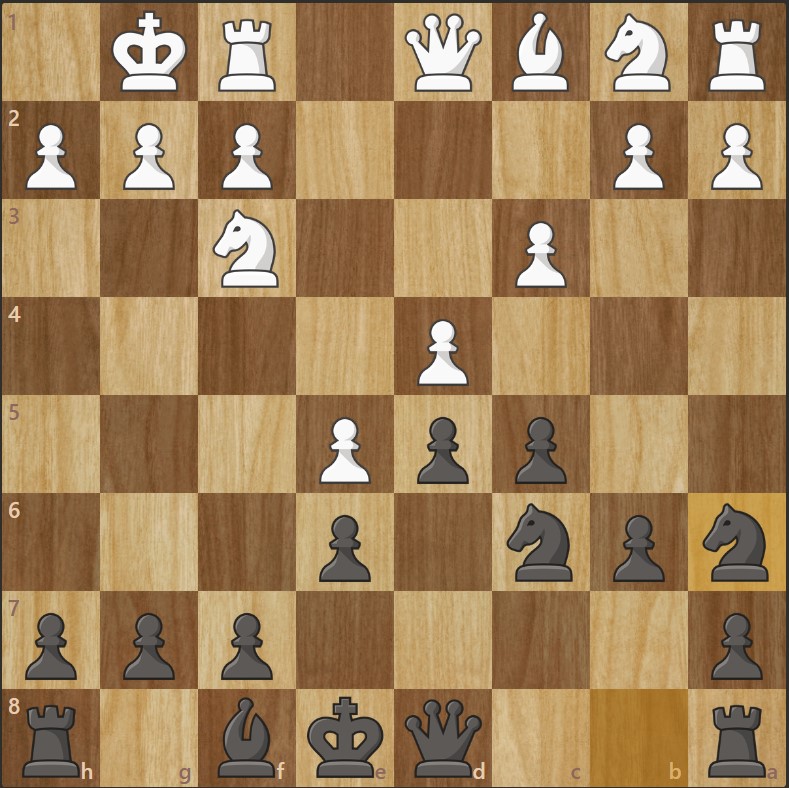
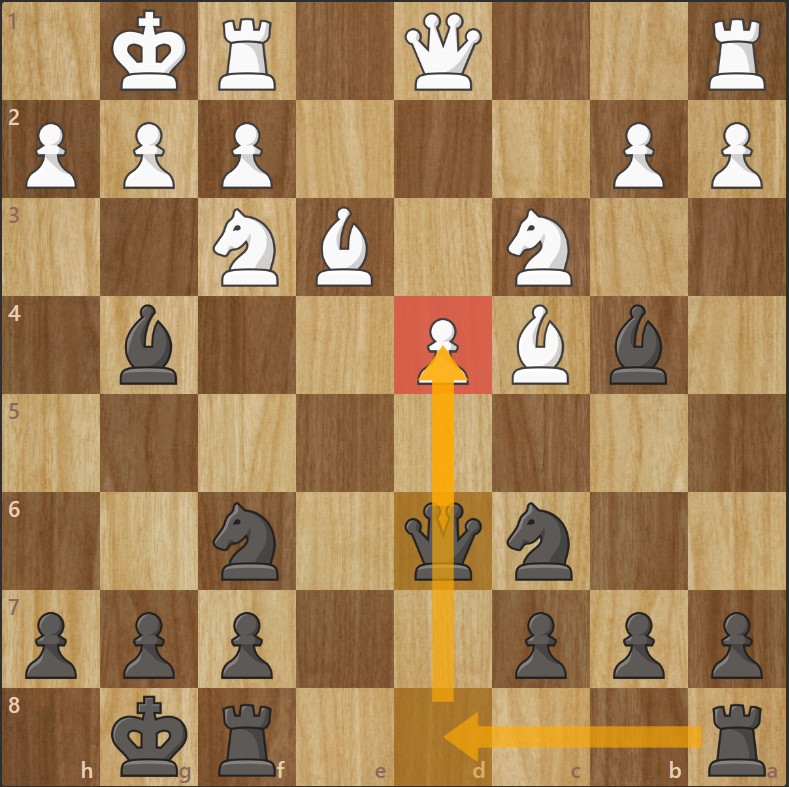
10…Na6
Black develops the knight to an unusual but logical square.
Objectives: cover c7, support …c5, and later reroute the knight via c7 toward e6 or d5 (see diagram).
The position is equal, and Black can aim for a draw if they wish.
Another mirror
In this development, White brings out their light-squared bishop first, then the knight to e2.
The objective is to exchange their dark-squared bishop (which is their bad bishop) for Black’s good bishop.
Symmetrical moves
Once again, by responding symmetrically, Black can parry this White threat (see diagram).
The position is still equal and solid for both sides. This is ideal if Black is aiming for a draw.
White’s initiative
To avoid all these mirror positions in which Black can more easily hold a draw, White must be more ambitious and take the initiative.
4. c4 Nf6
White breaks the symmetry and gains space on the queenside.
Black develops the knight and targets d5 and e4.
5. Nc3 Bb4
White develops the knight and supports d5.
Black brings out the dark-squared bishop to b4, pinning the knight and increasing the pressure on e4.
What matters here for Black is not to capture the pawn on c4 before White has moved their bishop from f1. The idea is to make White lose a tempo by forcing them to move the same piece twice.
No to greed
6. Nf3 O-O
7. Bd3 dxc4
8. Bxc4 Bg4
Black develops their bishop actively to g4, pinning Nf3.
9. O-O
White completes their development.
WARNING: If Black considers taking the knight on f3 to deflect the queen and then capture the d4 pawn, the backlash is immediate !
The white queen can in turn capture on b7, attacking the rook on a1 and completely destroying Black’s queenside pawn structure.
Hence the move: 9… Nc6.
d4 : target locked
9…Nc6
Natural development: Black brings another piece into the central fight.
10. Be3 Qd6
White develops the bishop and protects d4.
Black centralizes the queen and threatens …Rad8 → maximum pressure on d4.
Black activity
11. h3 Bh5
White chases the bishop, but Black prefers to retreat rather than exchange.
12. a3 Ba5
White pushes the second bishop back.
13. Rc1 Rad8
White places a rook on the semi-open file.
Black doubles their heavy pieces on the d-file, targets d4, and establishes a clear plan.
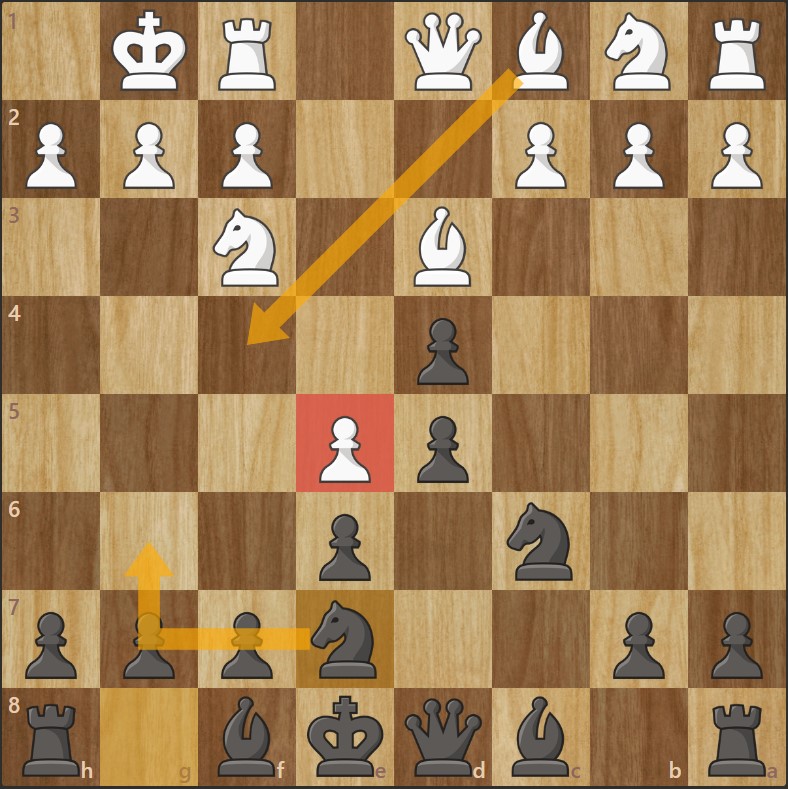
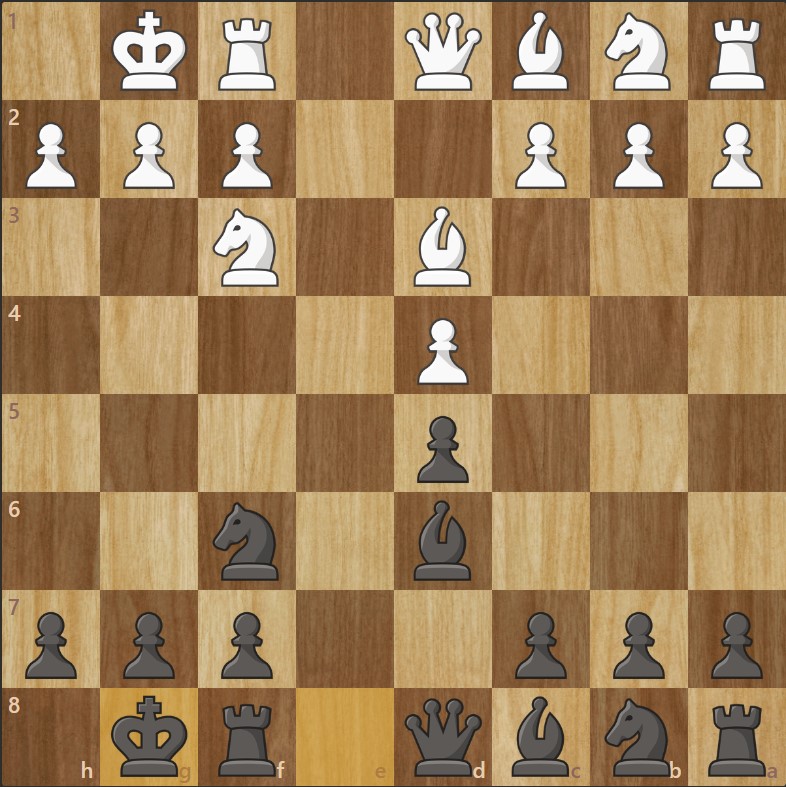
14. Be2 Bb6
White unpins the knight on f3.
Black repositions the bishop to b6, better coordinated with the queen on d6 and the rooks, increasing the pressure on d4.
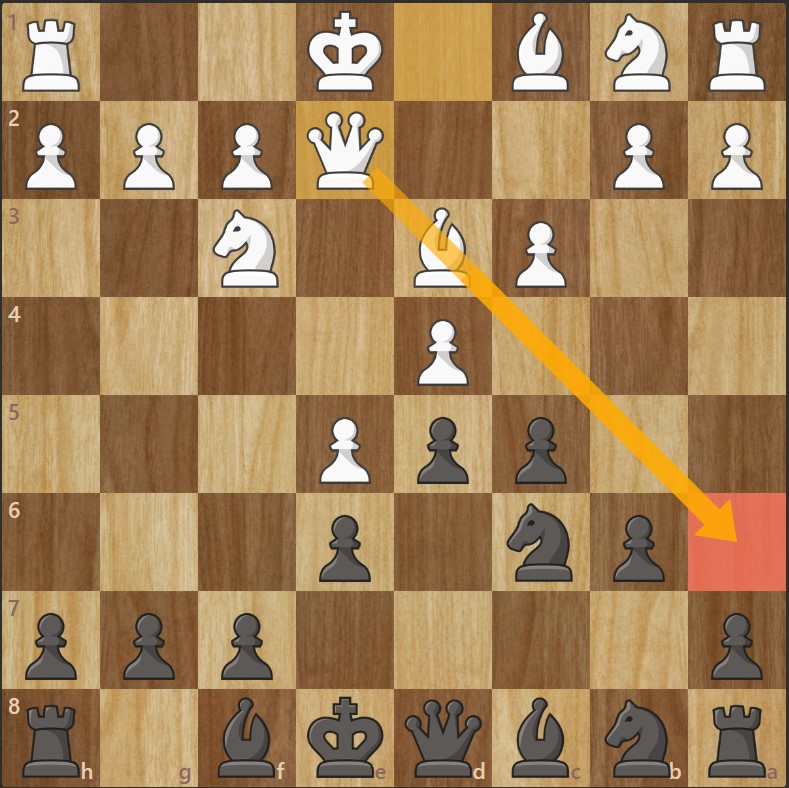
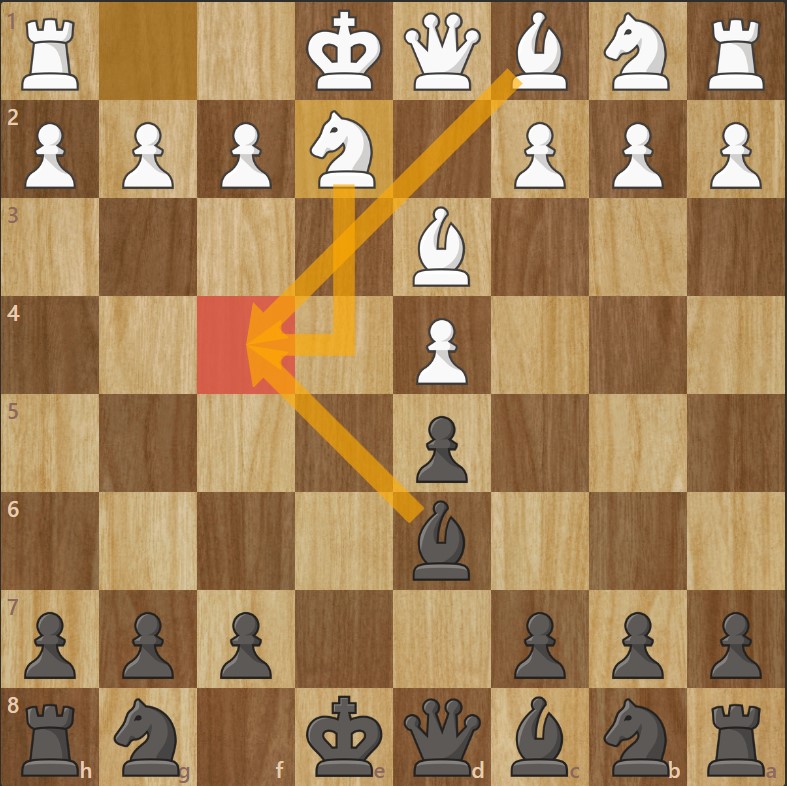
Potential position
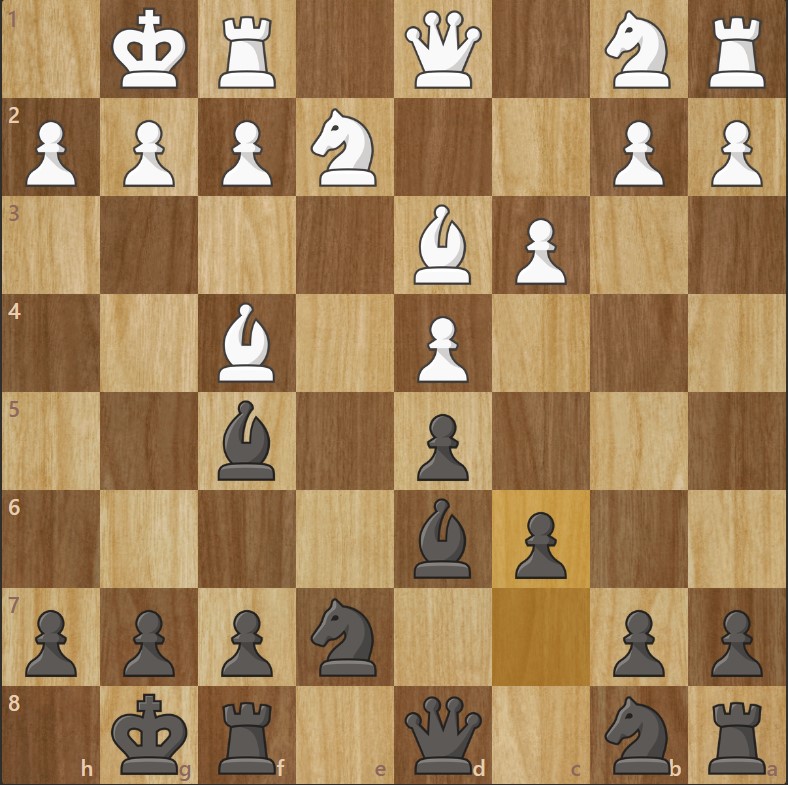
After about twenty moves, the position might look like this. Black is slightly ahead (+0.9).
The threat on f2 could already create serious problems for White at this stage of the game.