

The Ruy Lopez Opening
The Basic Principles of the Ruy Lopez Are :
- Control of the center with e4 and Nf3.
- Pressure on the knight on c6 thanks to the bishop on b5.
- Harmonious development and quick castling.
- A search for positional superiority rather than a direct attack.
Strengths
Solid and flexible: allows White to reach both quiet positions and highly complex ones.
Offers tremendous strategic depth: rich maneuvering plans (Nf1–g3, c3–d4, etc.).
Considered one of the most reliable and universal openings at the highest level (played by nearly all World Champions).
Enables White to maintain long-term pressure on Black, even without a direct attack.
Weaknesses
Highly theoretical: to play it properly, you need to know at least a minimum of lines and plans.
Can lead to closed and slow positions, which may not suit players looking for sharp tactical battles.
Black has several very solid replies (the Berlin Defense, the Closed Morphy Defense, etc.) that can neutralize much of White’s initiative when well handled.
Classic Structures (Morphy Variation)
The First Moves
1. e4 e5
- White immediately occupies the center.
- Black responds symmetrically.
2. Nf3 Nc6
- The white knight attacks e5.
- The black knight defends this central pawn.
3. Bb5 (the characteristic move of the Ruy Lopez)
- The bishop attacks the knight on c6, and indirectly the pawn on e5.
This is the basic idea of the opening.
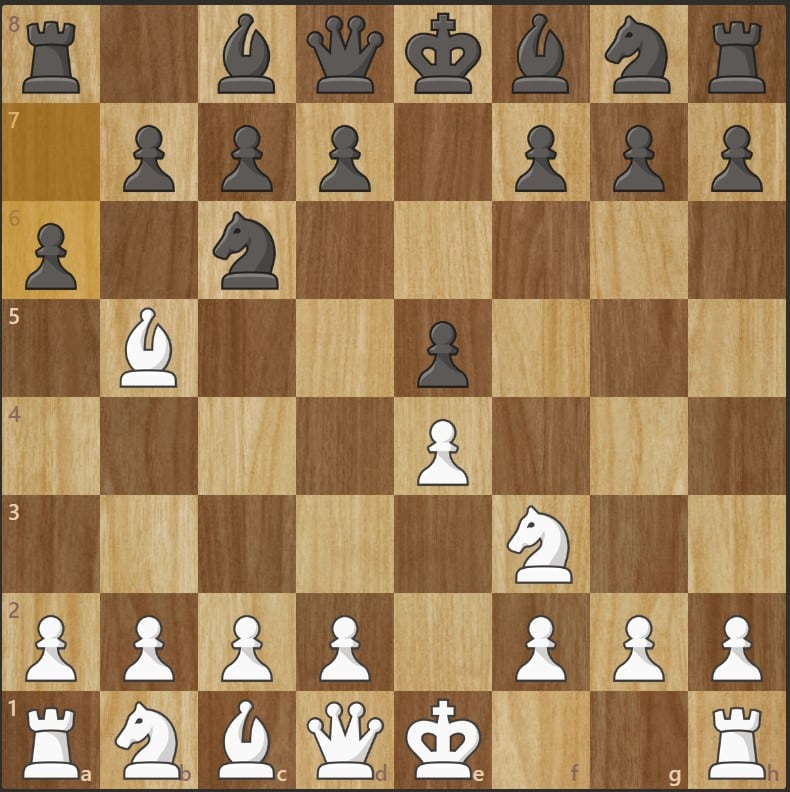
3… a6
- Morphy’s move: Black forces the bishop to make a decision.
The goal is to ask White the question immediately: exchange or retreat ?
End of the Setup
4. Ba4
- The bishop maintains pressure on c6 from a new diagonal.
No exchange yet — White wants to keep the tension.
4… Nf6
- Black develops a knight, attacking the e4 pawn.
This invites direct confrontation.
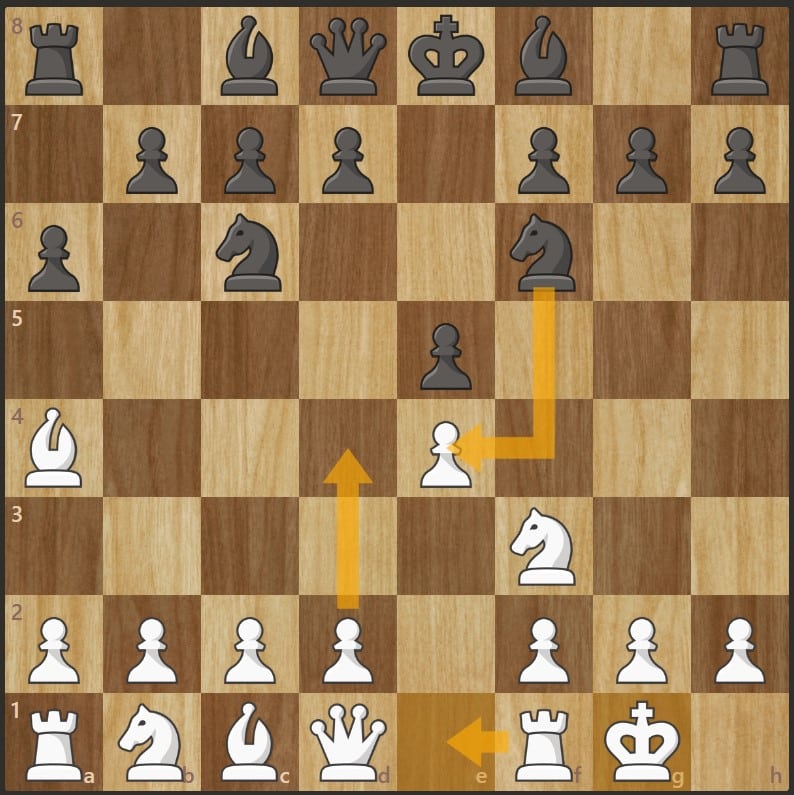
5. O-O
- White castles without immediately defending e4.
Idea: temporarily sacrifice the pawn in exchange for active play (Open Variation).
However, this pawn is quite easy to recover by pinning the knight on e4 (see yellow arrows), which will give White a positional advantage.
5… Be7
- Black prepares to castle as well.
They maintain a solid structure and avoid early tactical traps.
The First Threat
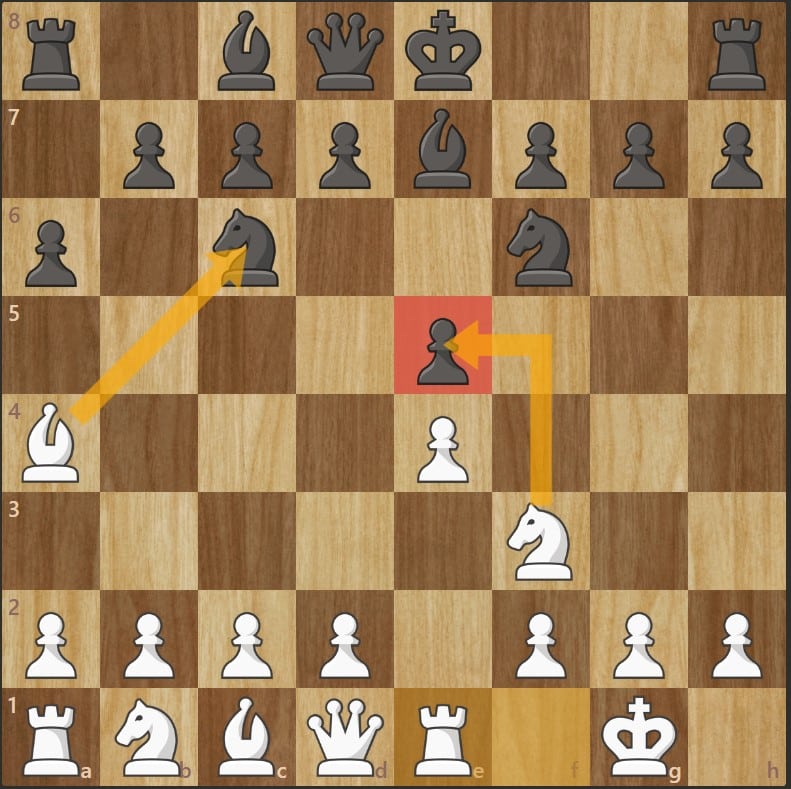
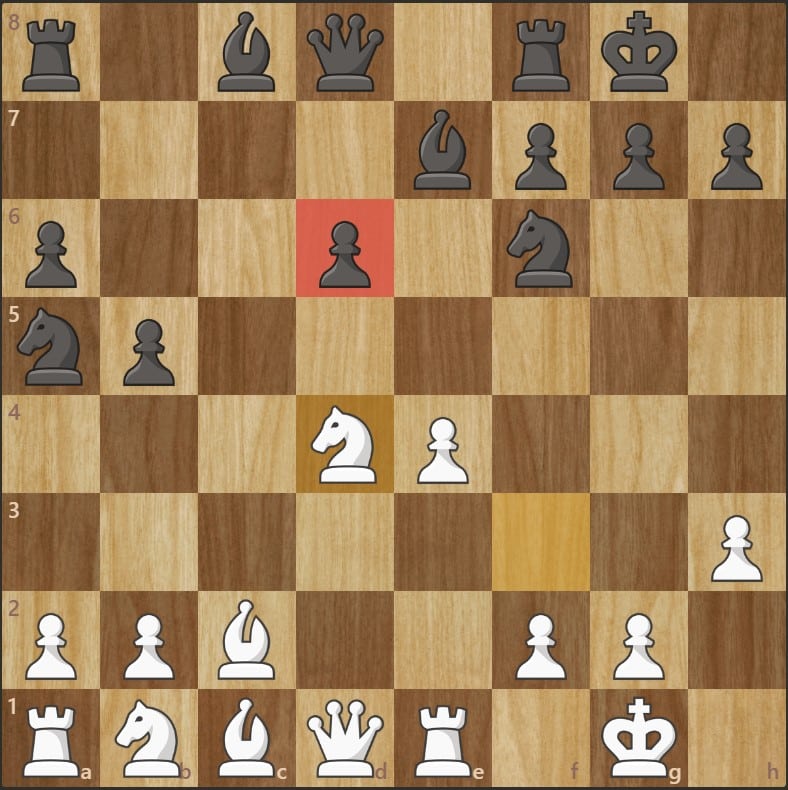
6. Re1
- The rook reinforces the e4 pawn.
This is the most common move at top level.
It often prepares c3 and d4 to claim even more central space.
It also introduces a threat (as shown in the diagram above):
Bxc6, removing the only defender of the e5 pawn, followed by Nxe5 to win back the pawn with the f3-knight.
Kings Safely Castled
6… b5
- Black drives the bishop back from b5.
They gain space on the queenside.
7. Bb3
- The bishop remains active on the a2–g8 diagonal.
It eyes the weak f7 square, often a strategic target in this opening.
7… d6
- Black reinforces the center.
They prepare to castle and support the e5 pawn.
8. c3
- White prepares d4 to claim the center.
Typical of the closed Ruy Lopez structure.
8… O-O
- Black castles, securing the king.
Their development is nearly complete.
9. h3
A very common prophylactic move.
Prevents the pin …Bg4 on the knight on f3.
Sometimes prepares g4 in more aggressive lines.

Gaining Space
9… Na5
- Black attacks the bishop on b3.
A classic idea: aiming to trade this very active bishop.
10. Bc2
- The bishop retreats while keeping control of the a2–g8 diagonal.
It remains an important attacking piece for White.
10… c5
- Black immediately challenges the center.
They prepare …Nc6 and additional pressure on d4.
11. d4
- White strikes in the center — a logical and strong move.
It opens the position and enhances the activity of White’s pieces.
Fire on d4 — White Holds the Advantage
11… cxd4
- Black captures in the center immediately.
12. cxd4
- White recaptures with the pawn.
Result: a solid central duo with e4 + d4.
12… exd4
13. Nxd4
In this structure, White is delighted: they have four connected kingside pawns, while Black is left with a lonely, backward pawn on d6 — an easy target.
Without Exchanges on d4, White Solidifies the Center
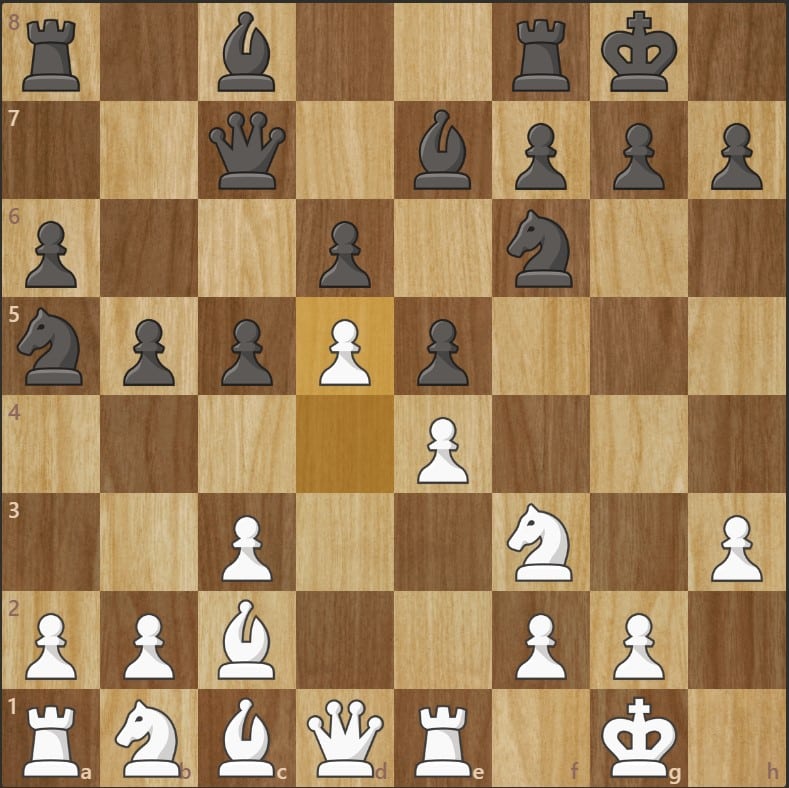
11… Qc7
- Black avoids the exchanges on d4, activates the queen, and adds a defender to the e5 pawn.
12. d5
- White takes control of the center and prevents the knight on a5 from jumping back to c6.
This move also blocks the development of the black bishop to b7, cutting off the long diagonal aimed at the white king.
White Locks Down the Queenside
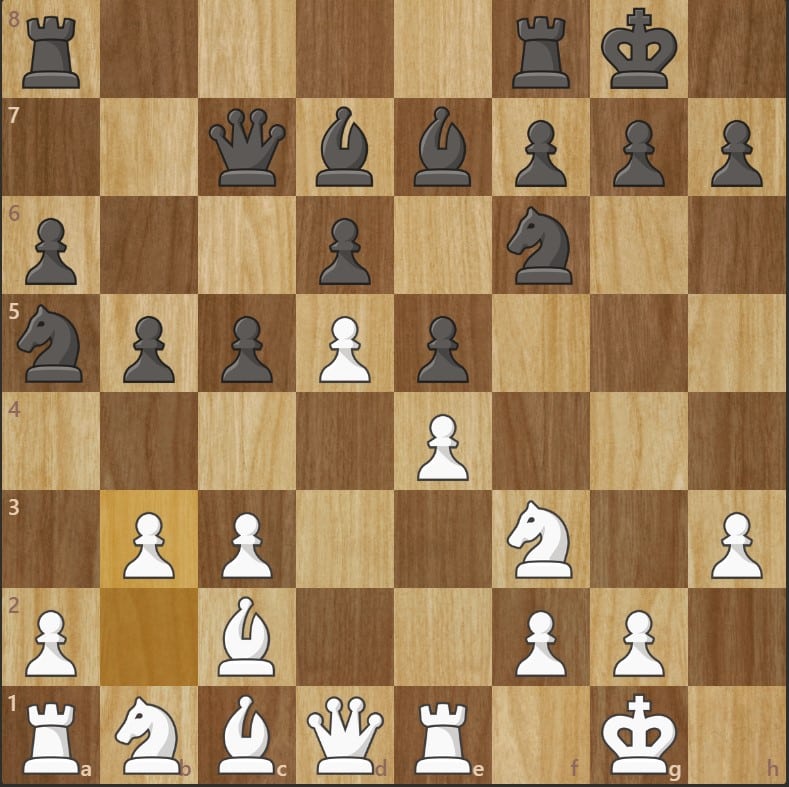
12… Bd7
- Black activates the light-squared bishop and connects the rooks.
13. b3
- White prevents the knight on a5 from accessing c4.
They also set up a tension with the pawns on b5 and c5: if Black pushes b4, White will reply with c4, and vice-versa.
With this move, White aims to freeze the queenside, preventing any meaningful counterplay for Black on that side of the board.
The plan is then to organize an attack on the kingside, where Black will have few useful moves and significant defensive difficulties.
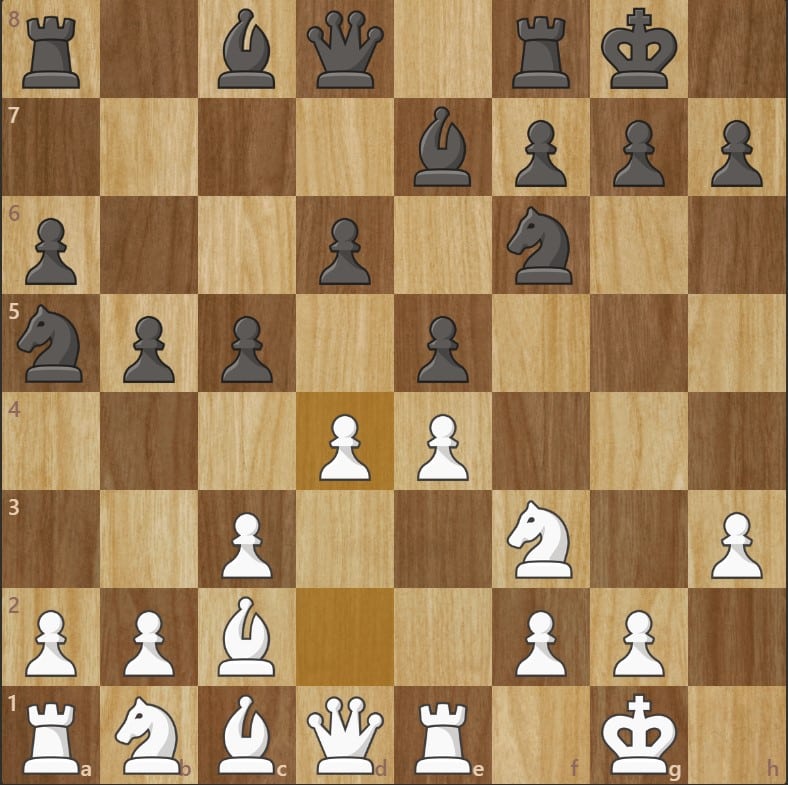
The Kingside Attack !
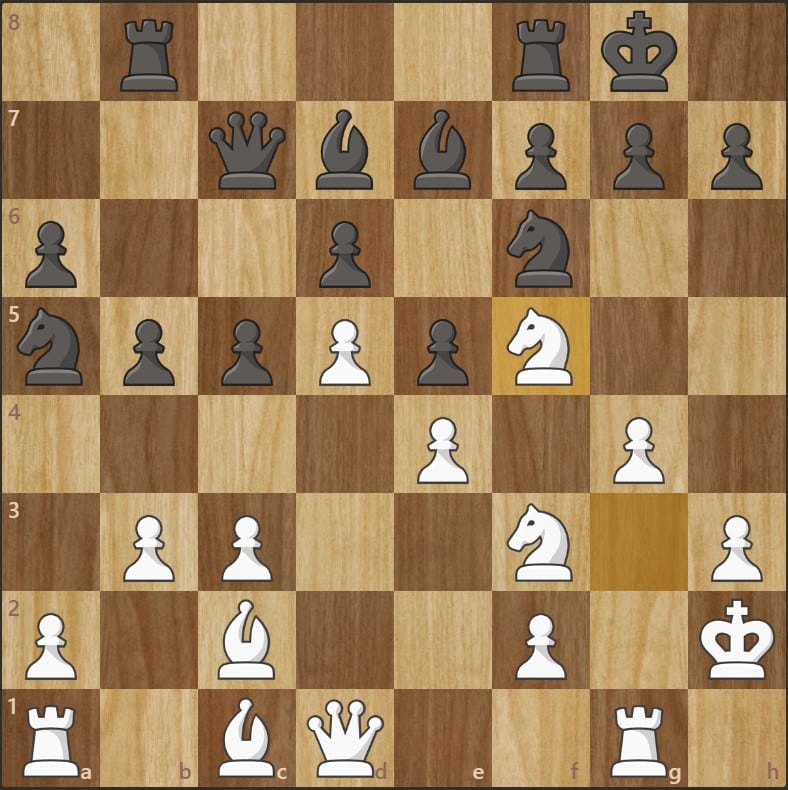
White now has enough time to organize and activate as many pieces as possible to pound the opposing kingside.
The diagram illustrates what the position might look like around move 20, but you are free to shape the attack however you prefer — there are many creative ways to conduct a powerful kingside assault.