Fast development, a solid center, and simple plans.
Can be played against almost any Black defense → a universal system.
Very beginner-friendly.
Strengths
Easy to learn: no need for tons of theory.
Very solid: hard to counter directly.
Provides clear and repeatable plans in every game.
Adaptable against most Black setups.
Ideal for improving strategic understanding rather than memorization.
Weaknesses
Less ambitious → doesn’t necessarily give White a big advantage if Black plays well.
Can be seen as somewhat passive: Black often equalizes quickly.
Black has several ways to break the setup.
Classic patterns
The pawn pyramid
This is a characteristic structure of the London System.
The objective here is to complete development without taking any risks while maintaining a solid center.
Often criticized for lacking ambition in the opening, the London System nevertheless offers a healthy and comfortable position to play.
The idea is often to focus on the rest of the game and develop tactical skills in the middlegame and endgame.
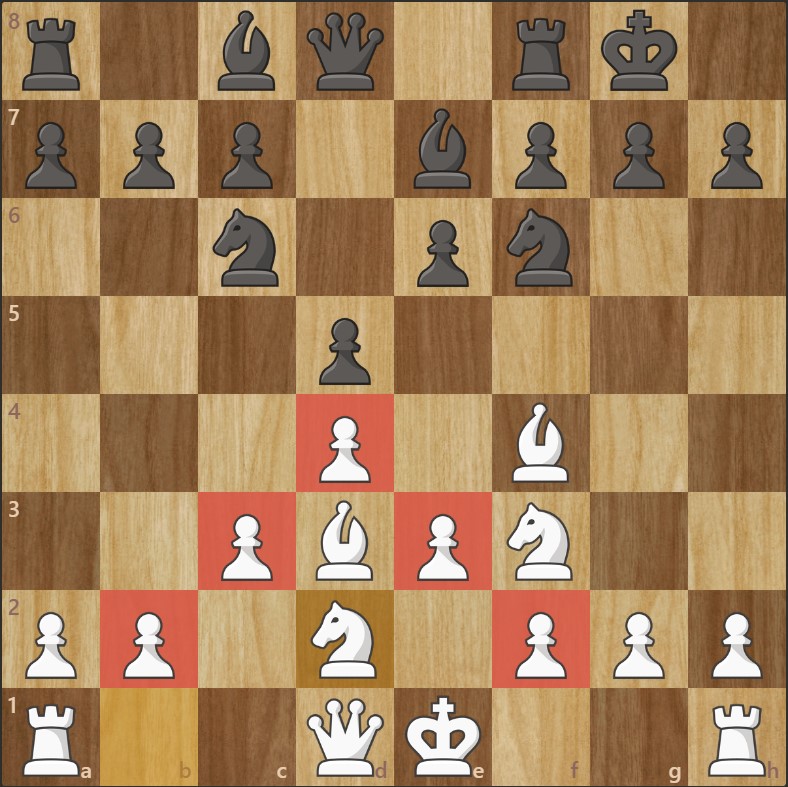
Situation 1
d4 d5
Bf4 Nf6
e3 Bf5
Nf3 e6
c3 Nc6
Development is harmonious and logical for both sides.
But in this position, at beginner level, White can often provoke mistakes from Black.
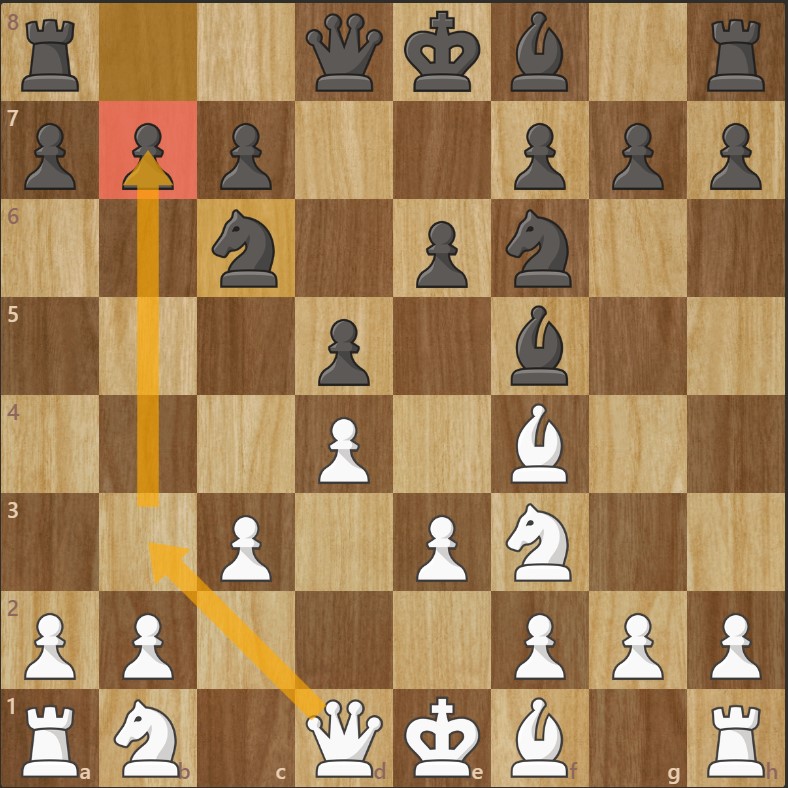
Situation 1 - continued
6. Qb3
White develops the queen and threatens the b7 pawn.
6… b6
Black’s MISTAKE: by trying to protect the pawn, they have weakened their knight on c6.
White is about to win material.
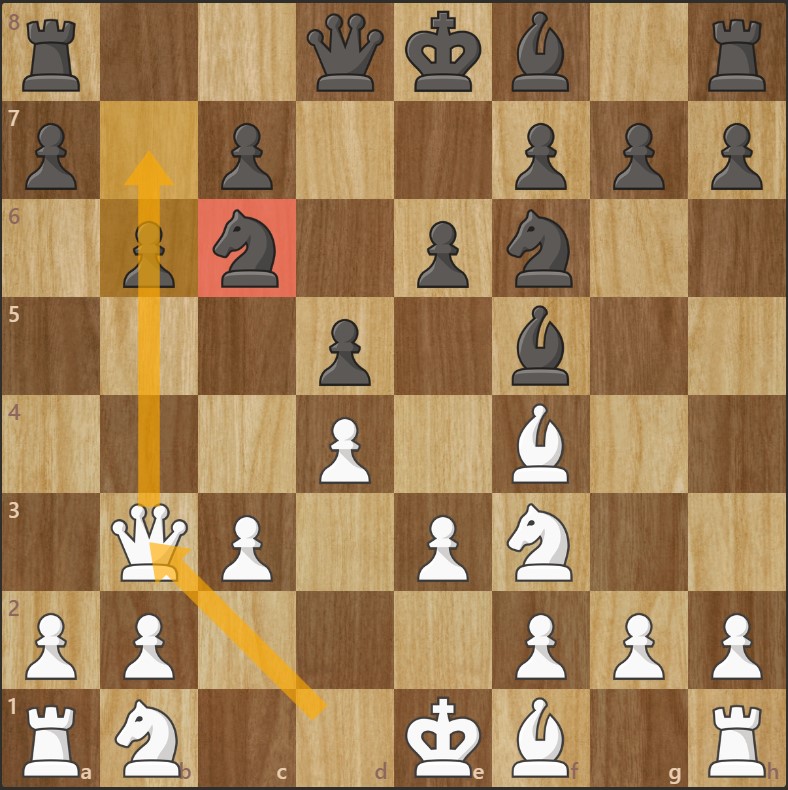
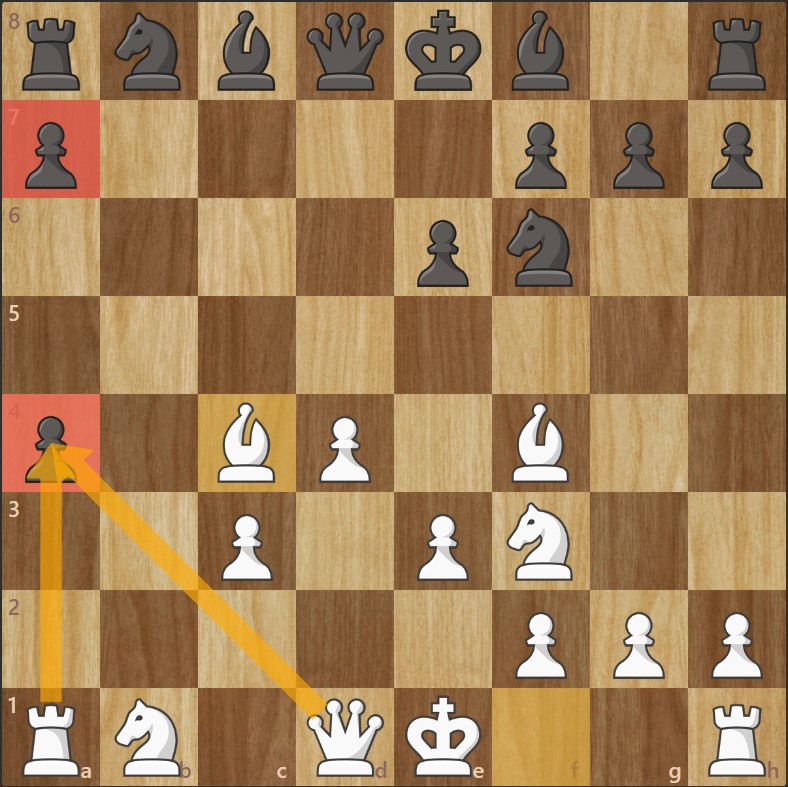
Situation 1 - END
Black tries desperately to defend the knight, but the position is winning for White.
White has brought a second attacker onto the knight — the queen.
The double attack, in the form of a skewer, will be fatal for Black.
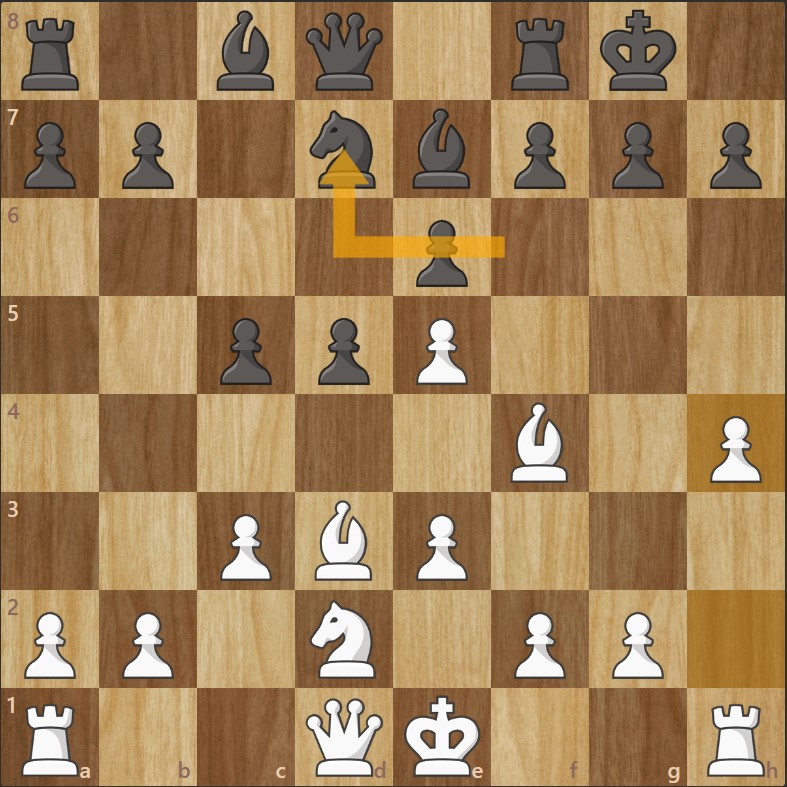
Situation 2
In this type of development, we notice that Black has a “shy bishop” on e7.
The idea will be to accelerate the kingside attack. After the exchange of knights on e5, White will recapture with the pawn and play on their advantage on that side of the board.
Situation 2 - Continued
After the knight retreats :
9… Nd7
10. h4
White launches the attack with the h-pawn push.
Black may be tempted to play b5 to free their light-squared bishop and establish central dominance… MISTAKE.
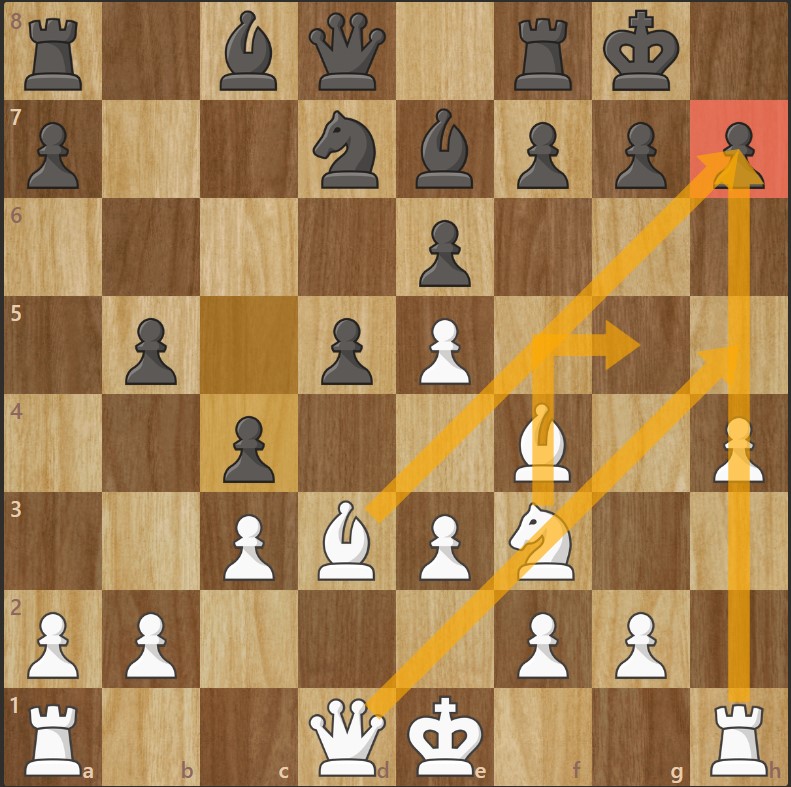
Situation 2 - End
h4 b5
Nf3 c4
Bxh7+
The bishop sacrifice with check seals Black’s fate. All the white pieces are aimed at the h7 square and are ready to strike.
The knight can jump to g5 (Ng5) to threaten MATE, a king/queen fork, or a discovered check from the h-rook (after a recapture with the h4 pawn).
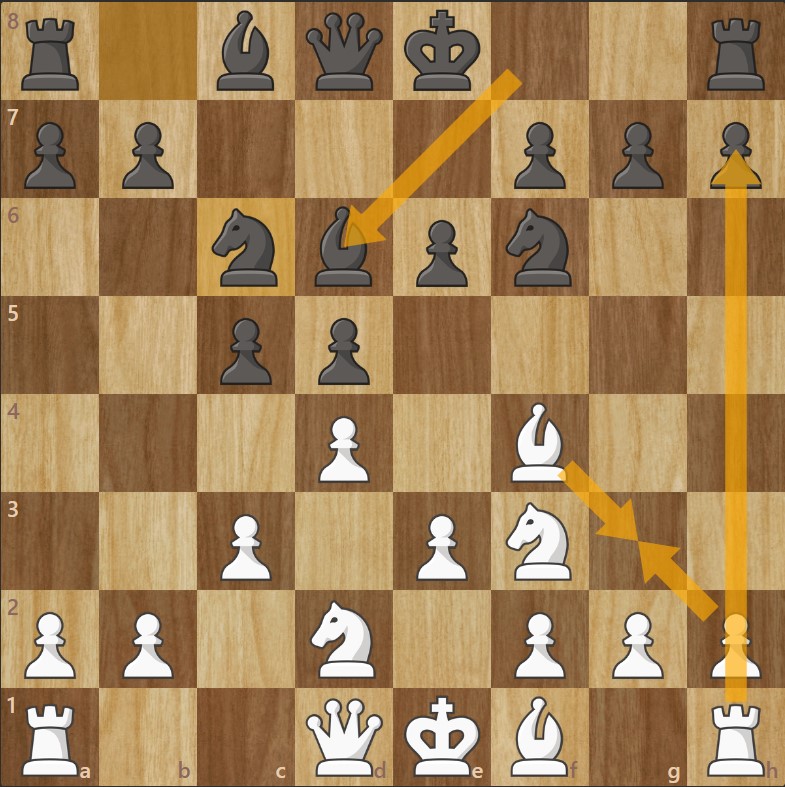
Situation 3
In this type of development, we notice that Black wants to exchange the dark-squared bishops.
The idea here is to retreat to g3 (Bg3), as shown in the diagram above. If Black captures the bishop, our h-file will be wide open against Black’s potential future kingside castling.
Situation 3 - Continued
The development continues normally, but if Black exchanges the knight on e5, White will win at least material — and potentially the game with a beautiful CHECKMATE explained just after!
White’s pawn structure is perfect, and their pieces are perfectly coordinated.
Situation 3 - Battle
The sequence leading to CHECKMATE is beautiful because it also includes a rook sacrifice. Here is how it unfolds :
13. Bxh7+ Kxh8
White captures with the bishop, giving check.
Black replies with the only possible move.
14. Bd3+ Kg8
A discovered check from White.
Only legal move for Black.
15. Rh8+ Kxh8
A rook sacrifice with check.
Black is forced to take.
Situation 3 - MAT
16. Qh5+ Kg8
The queen joins the attack, giving check.
A forced move for Black.
17. Qh7#
Checkmate !
After four forced moves for Black, the final blow is delivered.
Situation 4
In this type of classical development, Black is often tempted to push …c4.
The correct response for White is b3, which allows either :
to open the a-file and create a nice square for the bishop to develop (see diagram),
to win the pawn on c4.
This is why Black will try to reinforce with …b5.
Situation 4 - Continued
6… b5
An attempt to consolidate Black’s structure in order to avoid opening the a-file for White.
7. a4
No matter the capture order, White wins a pawn in this position.
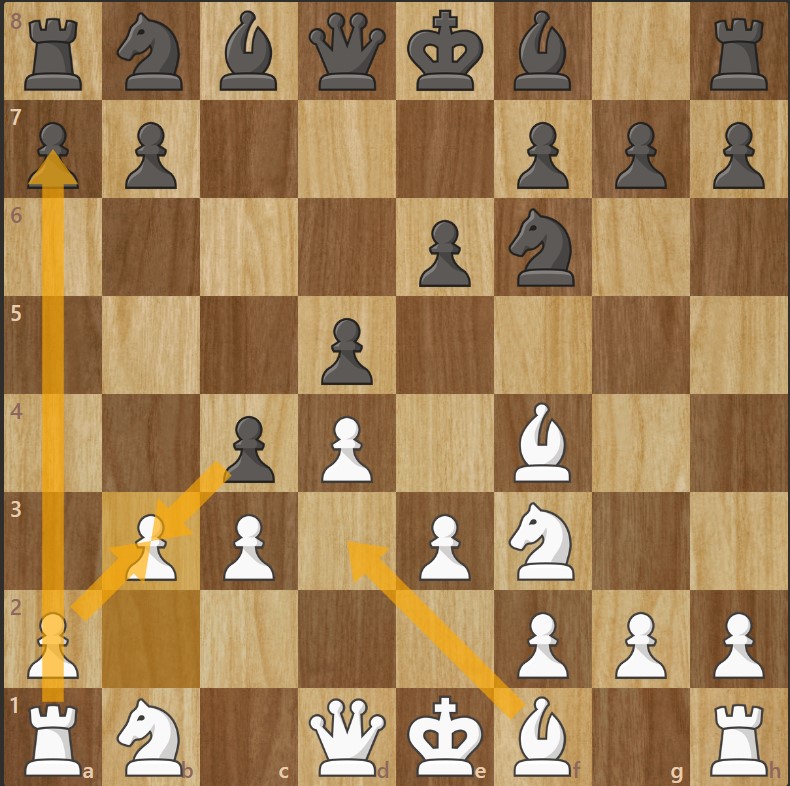
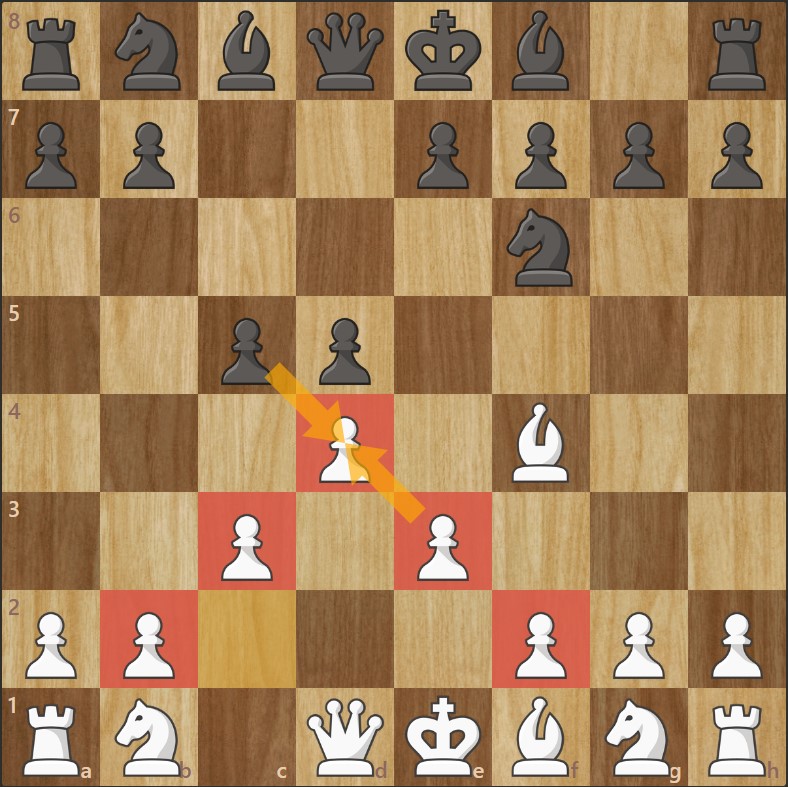
Situation 4 - End
Here is one possible outcome. We can see that :
Black has doubled pawns on the a-file, which are very weak and will soon be lost;
White has gained the center, already developed three minor pieces, and has a semi-open file.
Situation 5
In this fairly common development, Black may be tempted to attack the bishop on f4 to exchange it for a knight.
White can set a trap that is very tempting for Black at a beginner level.
Situation 5 - Continued
7. Bg5 f6
White escapes the knight by attacking the opposing queen.
Black responds by pushing f6, attacking the bishop.
8. Bh4
The white bishop retreats.
If Black plays g5 to trap the white bishop, it is a mistake !
Situation 5 - End
8… g5 (MISTAKE)
Black tries to trap the white bishop.
9. Nxg5 fxg5
White “sacrifices” the knight.
Black captures it.
10. Qxh5+
White regains the sacrificed piece, breaks Black’s castling, and will also win the g5 pawn while attacking the queen.
Situation 6
In this situation, Black tries to threaten the capture of the b2 pawn.
White’s goal will be to obtain a strong positional advantage — or even a material one — after Black takes this “poisoned pawn.”
Situation 6 - Continued
To do this, we prepare:
5. Nc3 Qxb2
White develops the knight to create counterplay.
Black captures the poisoned pawn.
6. Nb5
White now threatens a king/rook fork on c7!
6… Na6
Black tries to protect the c7 square from the fork.
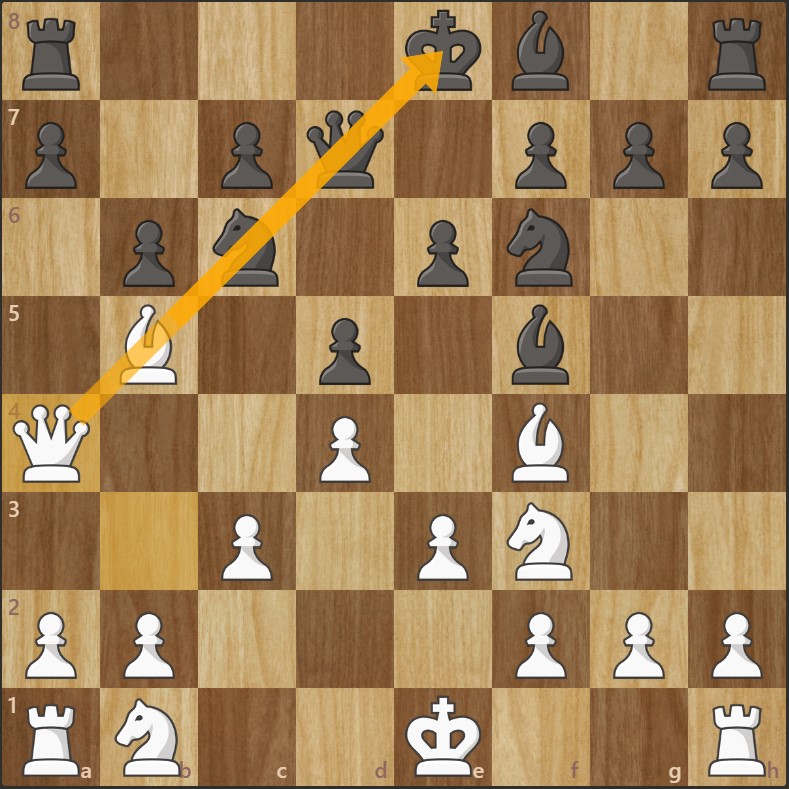
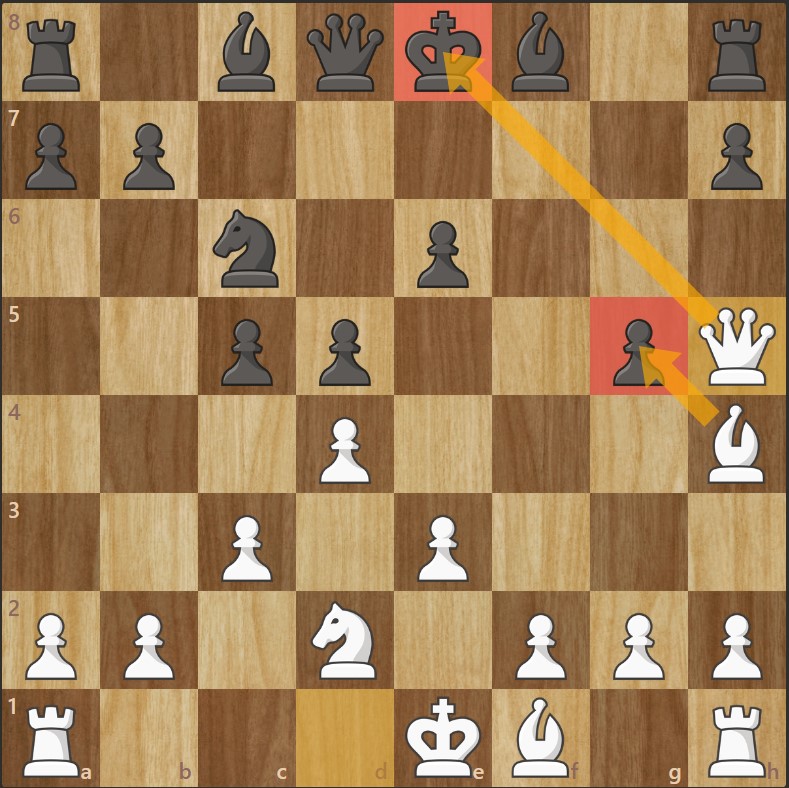
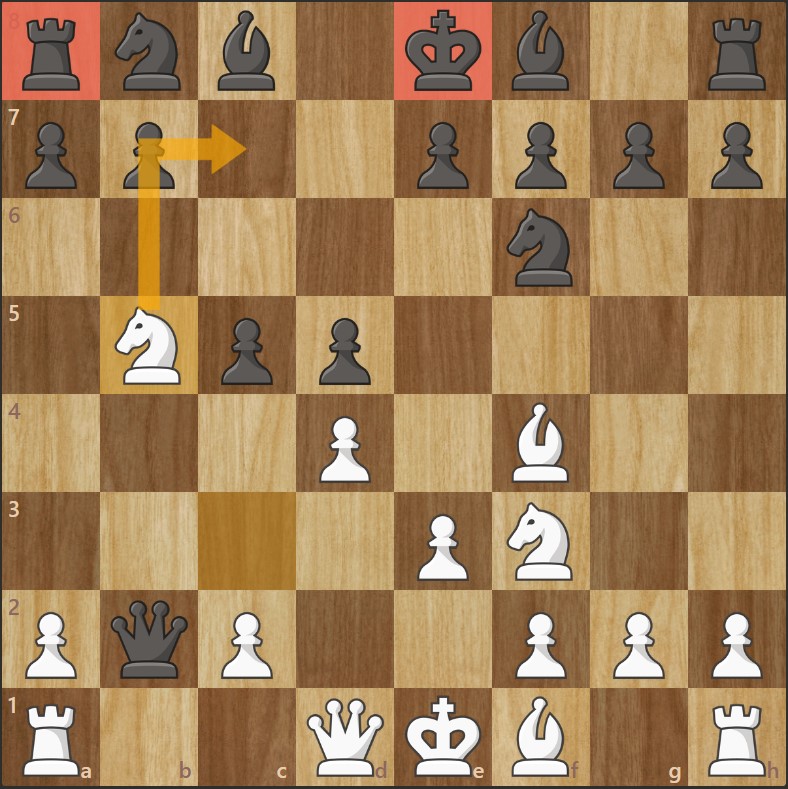
Situation 6 - End
7. Rb1 Qxa2
The rook chases the queen, forcing her onto a2.
The queen captures the a2 pawn.
8. Ra1 Qb2
The same sequence, but in the opposite direction.
9. Rxa6
The rook captures the knight — the only defender of the c7 square.
9… bxa6
Black captures the rook.
And White’s fork on c7 is unavoidable. The king is dragged out of safety and White gains material advantage !
Situation 7
In this case, Black quickly challenges White’s center.
White’s objective will be to complete the famous pawn pyramid, characteristic of the London System, and in case of an exchange, to recapture with the e-pawn.
The idea behind this is to obtain a semi-open file for the white queen, which can later be useful on e2.
Situation 7 - Continued
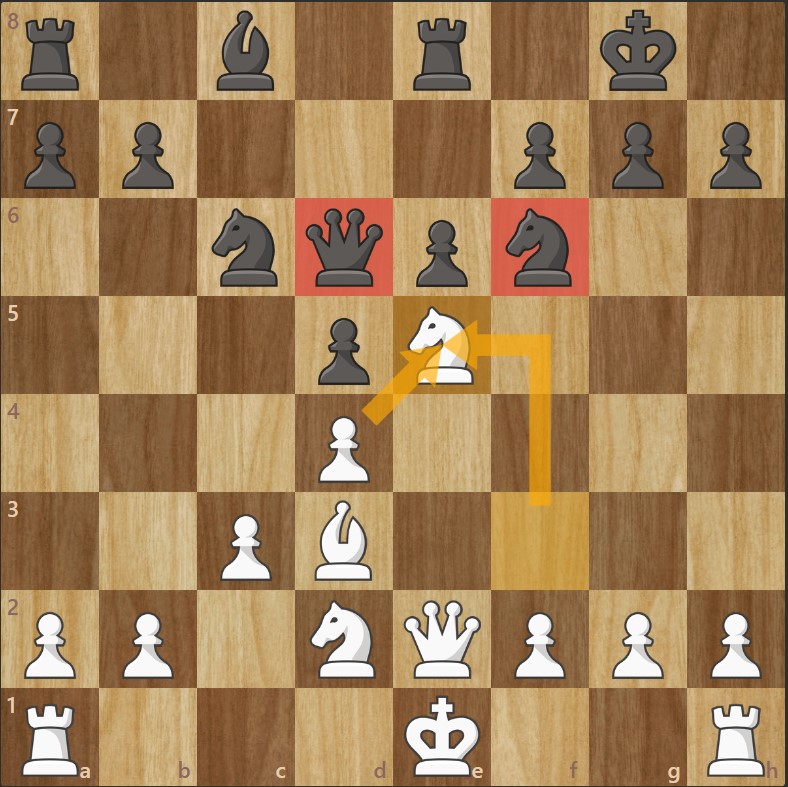
After about ten moves of development, our knight can find an excellent square on e5, from which it will be very difficult to dislodge.
Indeed, if Black exchanges it, White would recapture with the d-pawn (dxe5) and create a fork on the queen and the knight.
Situation 7 - The Assault
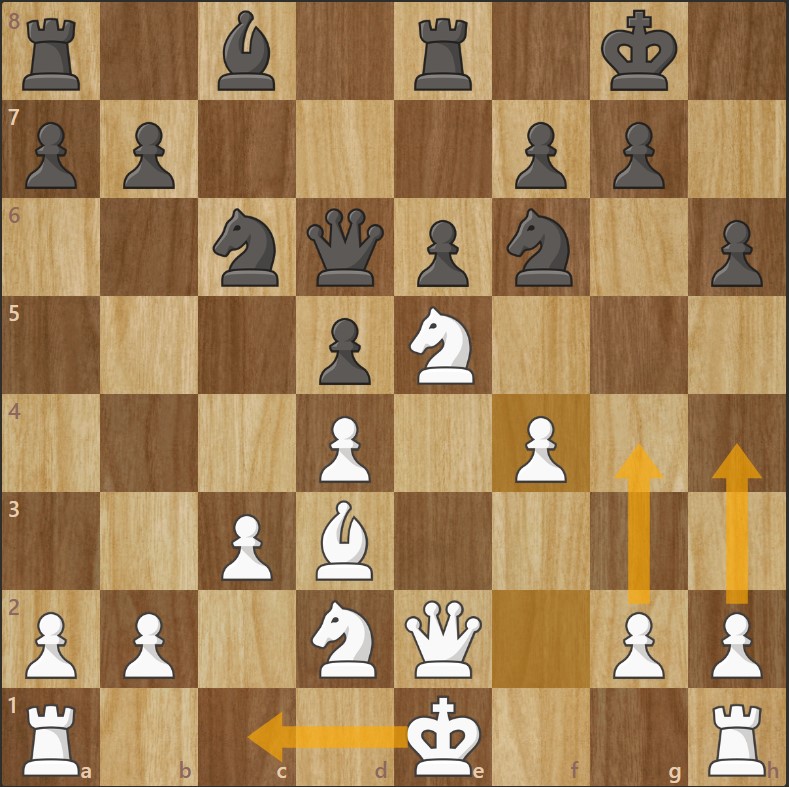
White can then reinforce the knight’s position with f4.
After that, the plan is to send all the kingside pawns toward the opponent’s castled king while castling long.
Defending the kingside will be very difficult for Black, and with precise play, it will be possible to create mating nets.
Situation 7 - MAT
In this situation, as in many others (seen above), the open h-file represents a major threat for Black.
The white queen will often be able to join the battlefield very quickly.